Triang No.77
Introduction to Triang No.77
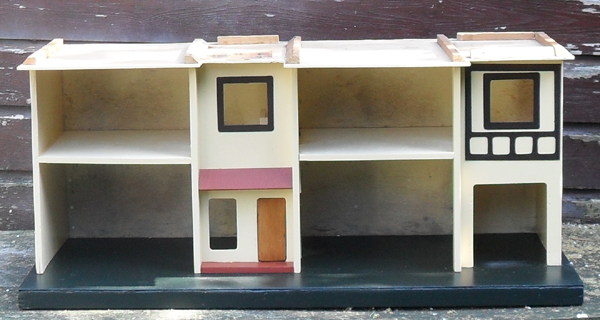
This is my next challenge, quite a big one I think, very basic only a wooden carcass no fittings apart from 4 window frames and garage doors to work with. I have had this house for a while, I bought it from a car boot sale for £10, it has been in my greenhouse providing spiders with a home. I was not sure if I was going to do anything with it, or not it is quite a large house. The house measures 33.75 inches [84.5 cms] wide, 20 inches [50 cms] high and 12.5 inches [31cms] deep. It is not possible to date it accurately, but was probably between 1938 – 1958.

When I took these pictures I forgot to put the door panels up against the house, they have no hinges to hold them in place.

This picture shows the two front panels, they have both been overpainted. The original paint shows up beneath it, but does not show any signs of flowers painted on them, I am sure this model has them.

The frame of this house is in quite good condition, with very little woodworm which is good news. It has however suffered from a fair amount of water damage especially around the base of the house. The green base is in very poor condition and is badly split, I will have to make a decision as to whether or not I will replace it as the house needs a good base for its size. I think it must have been stored in a shed or even a barn as it is so dusty and dirty.
The roof has been replaced by a plywood one, which is a bit rough, and will need replacing. The roof is stuck down with glue so it should be fun removing it.

This is the basket that came with the house, it had the stairs in it and the garage door, also odd bits of furniture which has seen better days.

Treating the Woodworm
The house has been painted all over with woodworm treatment. I have stripped off the roof and removed the base, so I can treat the splitting wood damaged by water and fill in woodworm holes.
The back panel show the remainder of some wallpaper which was all that was left, quite a large pattern it does look familiar I am sure I have seen them both before on other houses. This panel is in quite good condition, except for the bottom which is badly split, I will have a go at repairing it. There was some floor paper in some of the rooms, but nothing that could be saved.

This is one of the panels which has water damage and has split. [notice the lovely rusty nail]

The worse woodworm holes I have found in the house seem to be around the front door, I am sure there were better places for them to dine than right at the front of the house.

If you look at the right hand side of the base you can see how it is warped, I will try to repair and strengthen it but I don’t think I will have much success.

I separated each layer of the plywood and made a glue and wood sandwich, there was not sign of woodworm dust so was quite an easy job.

It is just as well I have got lots of little clamps to keep all my wood and glue sandwiches together.
All the panels of the house have now been glued and repaired. I have to make a decision about the base. I always try to save and use as much of the houses, when I restore them, but sometimes it is not always possible.

It has been damaged by water, and you can see how the wood has split. So I have made the decision to replace it with a new piece of ply wood. The No.77 is quite a large heavy house and needs a firm base.

The Back Panel of the house is a bit rough, with two pieces of wallpaper, the wood has split in places around the bottom edge. As it does not have to support anything it will be fine, and I will be able to use it.

I have glued and filled as much as I can, the bare wood piece you can see will be filled and painted. I have to laugh when I see this picture, it was taken in the Summer, as you can see buckets and watering cans spread out to collect water, as we had not had any for a while. [Writing this in January we now have too much water]
Doors
I don’t have any internal doors for this house, only the front door and garage doors. Sadly the door furniture for the font door is missing.

I will just sand them down and varnish them. I also have the stair case to paint, but first I must treat them for woodworm as I have spotted some little holes, I am not taking any chances.

The garage doors need sanding carefully to keep in the ridges, also the wood by the hinges is very weak and needs strengthening, before new hinges can be fitted. By not doing too much to them, it will add to the character of the house.

This is what I am using as the front door, although I think it might have originally been an internal door as there are no marks showing where a door knocker of letter box may have been fitted.
Having just completed the restoration and alteration of a Triang Stockbroker house, I have spare set of door furniture for this house.

A little side window has also been fitted.
New Roof
The repairs to the house have now been completed, and treated for woodworm. It has been repainted and has a new base. The next big project is to fit a roof.
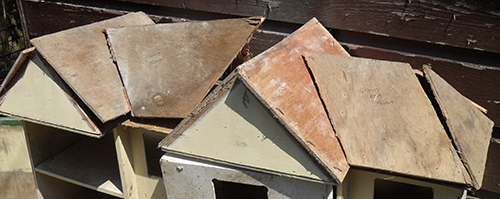
The house had a plywood roof which took a while to remove as it was well glued and nailed. I used each piece as templates for a new heavy-duty cardboard roof. Below is a picture of the panels that are needed to complete the roof. 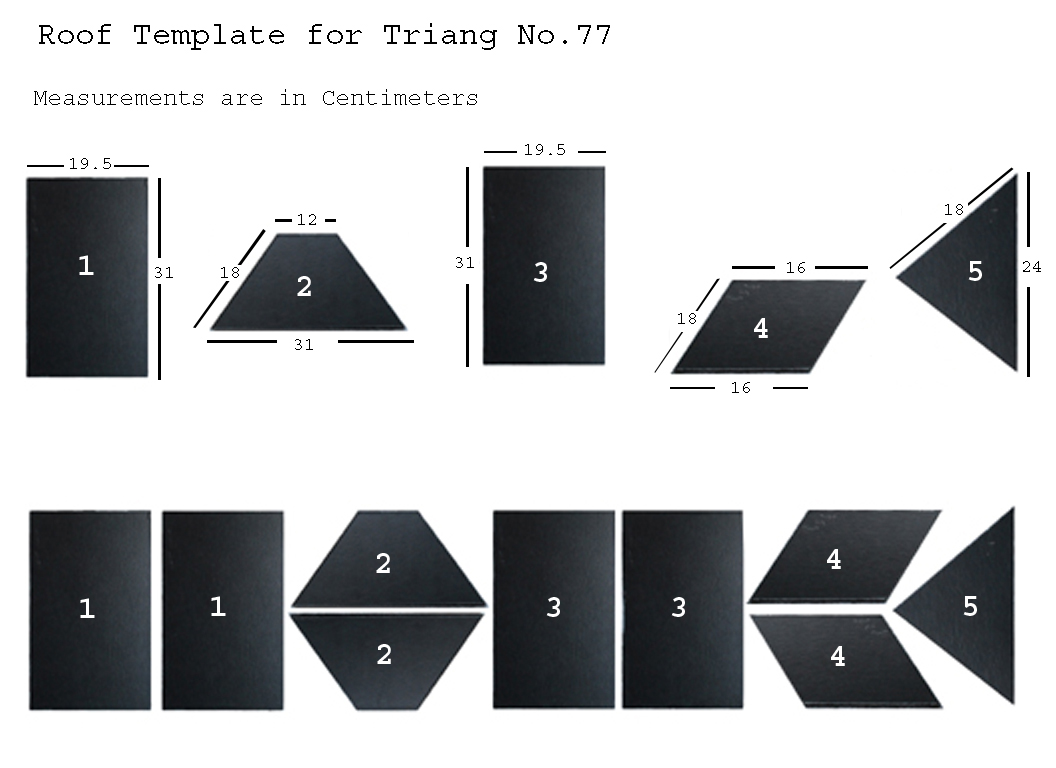
I removed the pieces of wood which held the roof panels in place, if I remove the glue from them, they will be able to be used again. It was one of those jobs I thought would be a good idea at the time, I am not sure what sort of glue it was, but it certainly was very hard.
The new panels have now all been cut out, but I needed to find a way of making a tile imprint pattern on them. I have made a tool from an old knife to do the job. It took me ages to cut this in half. The edge has been grinded down to make a fine line imprint.
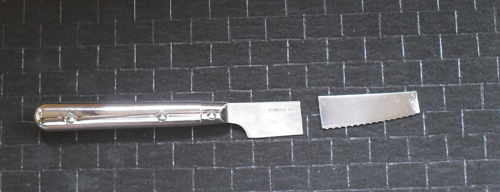
The end of the knife made the downward lines and the handle end made the across lines to form the tiles. This worked very well and even when the roof was painted, the lines can still be seen. It took quite a long time to complete all the roof panels, but I was very pleased with the result.
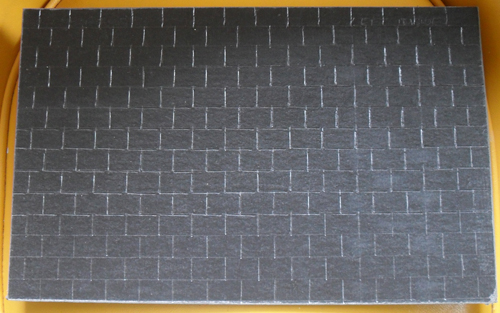
First of all I marked out the lines with a pencil and ruler, using my knife tool as a guide for size.
This is the finished roof panel after imprinting the tile marking. I think my knife tool worked quite well.
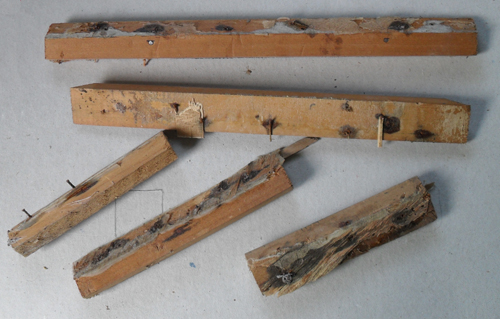
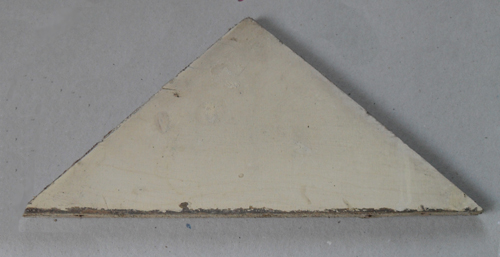
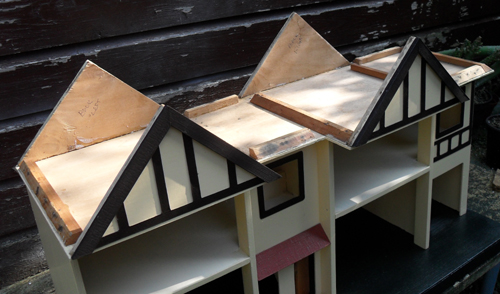
The triangular gable ends had no beams or edging on them. They had to be sanded and filled in various places, also some of the wood had split so needed to be glued together.
I used the measurements from my No.76 house, as this is the same size at the No.77, and made the beams and the roof edging.
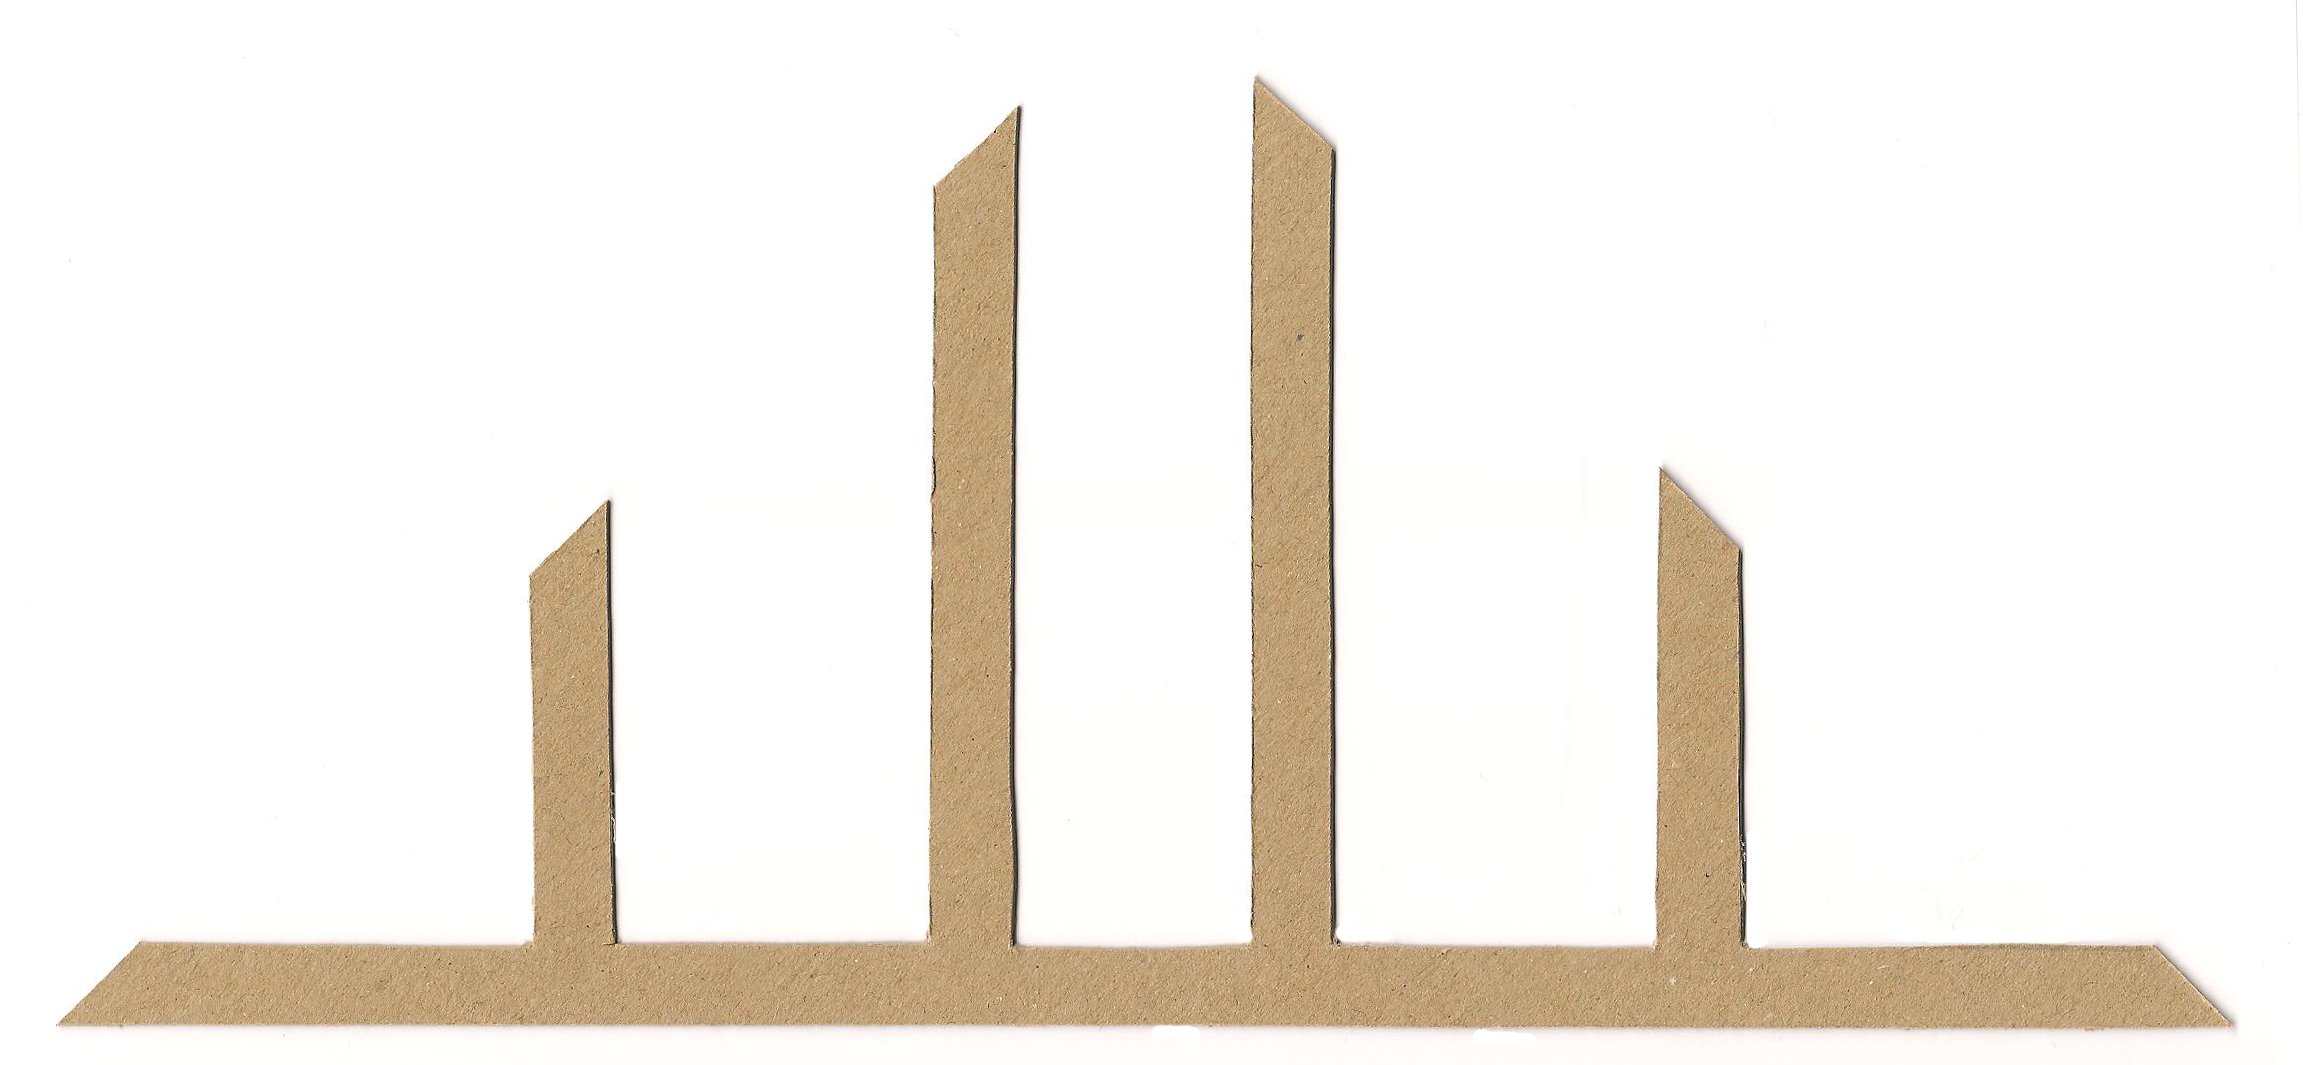
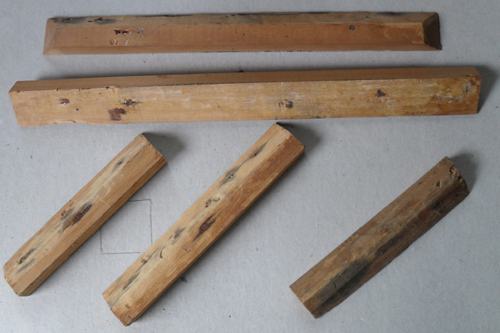
The beams are made out of stiff card, and them painted matt brown.
A roof edging was made using the same heavy-duty card as the roof.
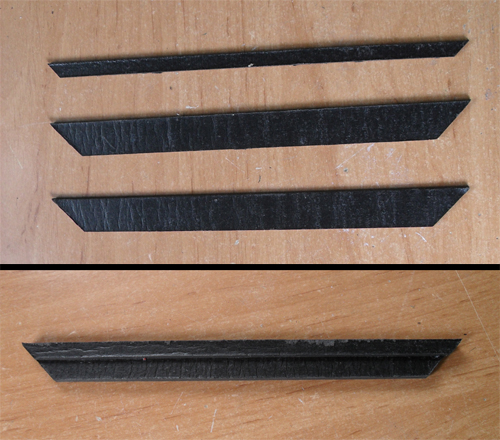
The card was built up in layers to make a gap for the new beams to fit into.

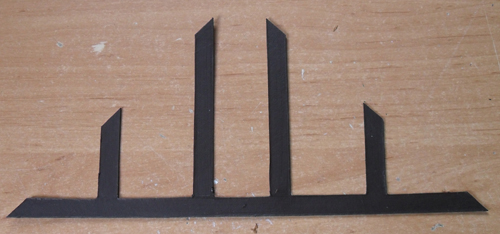
All the pieces were now ready to enable me to attach the roof to the house. The gable ends were fitted into place along with the strips of wood to support the roof panels.
The roof panels have been painted are now ready to be fitted, the edges attached to the wooden strips with small nails and the roof panels finished of with gummed paper parcel tape.
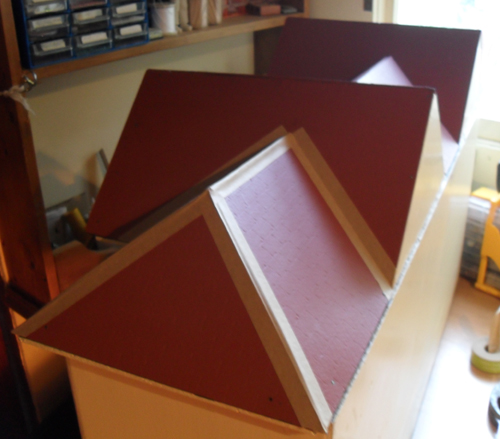
Once the gummed parcel tape was dry I put on another coat of paint onto the roof and then sealed it with antique pine varnish. I find that this varnish softens the hardness of the brick colour, as it does not give an even finish.
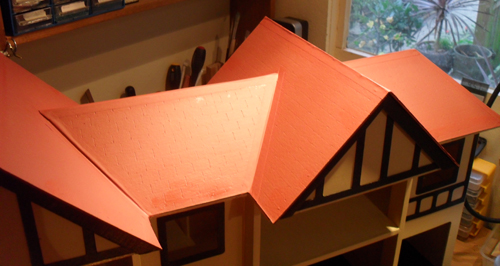 The roof is now complete. [It does look a bit orange in this picture, but it was getting dark when I took the picture and the flash makes it quite bright].
Fretwork
This house being basically an empty shell, has no fretwork on the front around the windows and triangle roof panels. I was not sure how I was going to replace the fretwork on the two doors as it is quite intricate. Looking around at my other houses I noticed that the No.76 had the same fretwork pattern and the doors were the same size. I did not want to remove the fretwork from this house, as it was original and a little fragile. I could have taken the door off and scanned it, but this I felt would not provide a good result. Inspiration struck why not copy it in the same way as you do brass rubbing.

Blu tac was put on each corner to keep the paper on the house, then got to work with my pencil. Hey presto the fret work was appearing nicely.

And I kept rubbing and rubbing….

This is my completed rubbing, I have gone around the outline with a pencil and used a ruler to get nice straight lines.

I cut the outline very carefully with a sharp craft knife.

A perfect match…

The paper outline was then traced onto a piece of card. I used a card reinforce envelope, it does not need to be very thick card.


The fretwork has now been cut out and fits nicely on the door, it is now ready to be painted.

Two of these were needed, and also a smaller one with a simpler pattern.

Front Door Panels
The door panels have been painted and varnished. I have painted the flower decal with acrylic paint. I do it this way so that if I make a mistake it is easy to remove, the flower decals are then varnished.

Windows
There are 6 large widows on this house, but I only have 4.

I do have 2 smaller windows spare so what I have done is to make the window holes smaller by making an extra beam around the window.

I am quite pleased with the result, it will do until I can get the right size.


Visit this page to see how I restore my Triang windows …. WINDOWS Having just restored a Triang Stockbroker, I now have 2 spare large window, which will be used in this house.

Completed House
And that’s it the No.77 is now complete, I am very pleased with myself. From a shell of a house fit only for the rubbish tip, I have created a Triang House good enough to live in again. I will put my Triang furniture in this, I also want to decorate it with reproduction Triang wallpaper, but that’s a job for another day. Most of the dolls houses I restore have been overpainted or full of woodworm, rust or have suffered water damage. This one had it all.

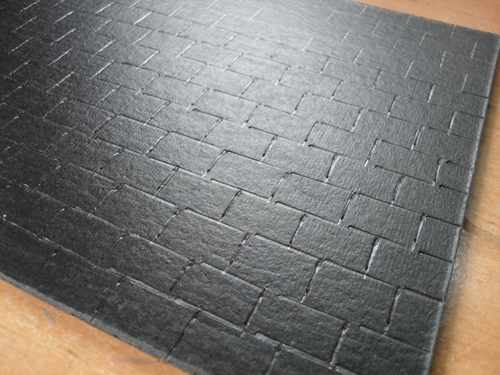
Homemade Wallpaper and Flooring finish it off.


Decorating

The Triang No.77 is finished on the outside, it is now time to start decorating the rooms inside.

I have decorated the rooms with floor and wall paper that has been recreated from original Triang wallpaper, except for paper in the kitchen.

There does not seem to be a Triang Kitchen wallpaper, so I designed one that I thought would suit the kitchen. Most of the Triang Houses seem to have a more floral or patterned style of wallpaper.

The Garage has a new brick floor. The walls are staying as they are, even though they are a bit rough.
Does anyone know someone in the south west who restores Tri-ang 77 doll’s houses?
A tough assignment this one I think so good luck. I will enjoy watching the developments. Michelle